Customize portal branding
Who: Administrators.
Make the portal recognizable with your organization's title, logo, and invitation message.
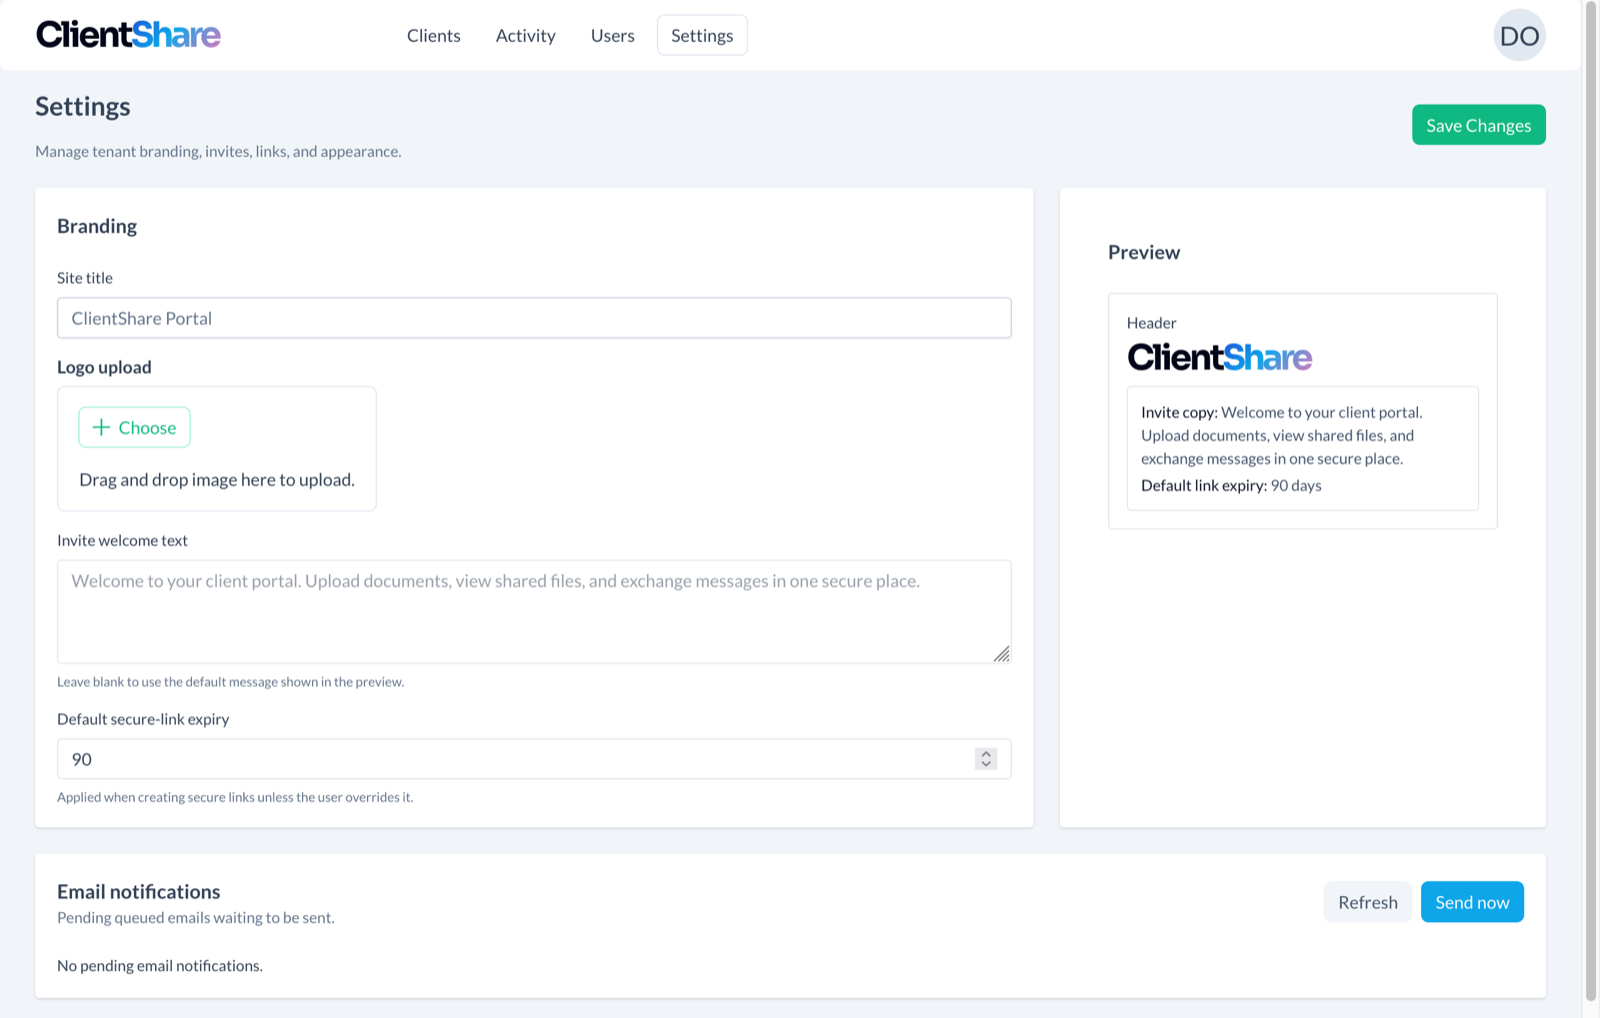
Update the title and logo
- Open Settings.
- Enter your preferred Site title.
- Under Logo upload, choose or drop an image. The current picker accepts images up to 1,000,000 bytes (about 1 MB).
- Check the Preview panel.
- Select Save Changes.
Use a simple logo that remains legible at the small size used in the navigation. Reload the portal after saving to confirm the published appearance.
To remove a logo, select Remove current logo and save. The preview shows the expected header before you commit the change.
Customize invitation text
Edit Invite welcome text to explain who the portal is for and how recipients should use it. For example:
Welcome to our document portal. Use this space to send requested files and download the documents we prepare for you.
Leave the field blank to use the default message displayed in the preview. Save changes before sending new invitations.
What about colors?
The current Settings screen does not expose a primary-color editor. Branding colors may depend on deployment configuration or the installed version; the title, logo, and welcome text are the controls covered here.
For link defaults and deployment-specific controls, see Portal settings.